“VINTAGE REIMAGINED” with Island Batiks
As an ISLAND BATIK AMBASSADOR, this month’s challenge was to creative a project under the topic if “VINTAGE REIMAGINED”.
As a traditional quilter, I have always loved the idea of trying to use my Island Batiks in a traditional way to bring a kind of new look to traditional projects. With “VINTAGE REIMAGINED”, it was the perfect time to do that once again.

When I first sat to think about what I’d like to do for this month’s challenge, my first idea was to center the project around a star. I thought about doing something along the lines of a crazy quilt; I considered another Quilt-As-You-Go method quilt….but in the end, the star won.
I would like to mention that the beautiful fabrics used in this project were given to me by Island Batik; batting provided by Hobbs Batting.
A couple of years ago I designed a fun star themed table topper with 4 large star blocks with sashings and a border…. I entitled that project “DINING WITH THE STARS”. For this months ISLAND BATIK AMBASSADOR project, I’ve taken one of those start blocks; changed it up a little – and creating a single star table topper entitled “A STAR IS BORN”. Measuring 36″ x 36″, it is the prefect size to fit the 36×36 required size for this month’s challenge.
The quilt top is one that you can make up in a couple of hours…perfect for when you want to start/finish/enjoy a project the same day.
OH….and I know it’s March and Spring…. but for this project, I’ve decided that I’m going to get a head start on another fun Fall display project for my home.
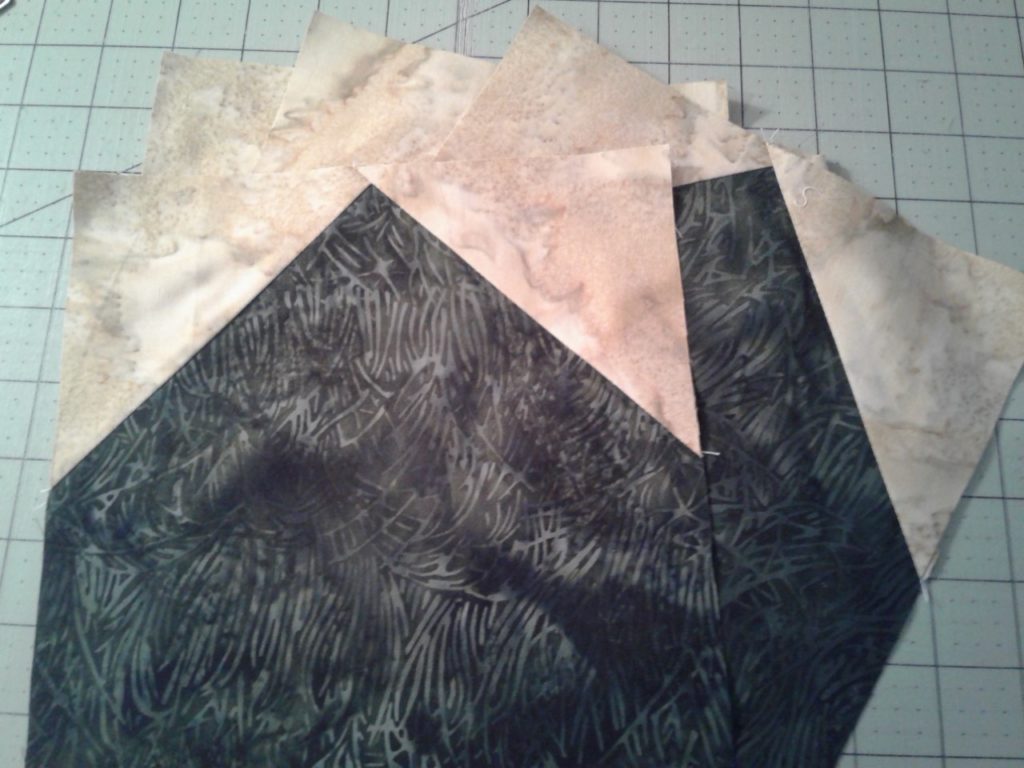
“A STAR IS BORN” started with a center 8″ block……and there are 8 blocks surrounding that center block that also measure 8″. 4 of those blocks were snowballed with 4-1/4″ squares to coordinate with the center.
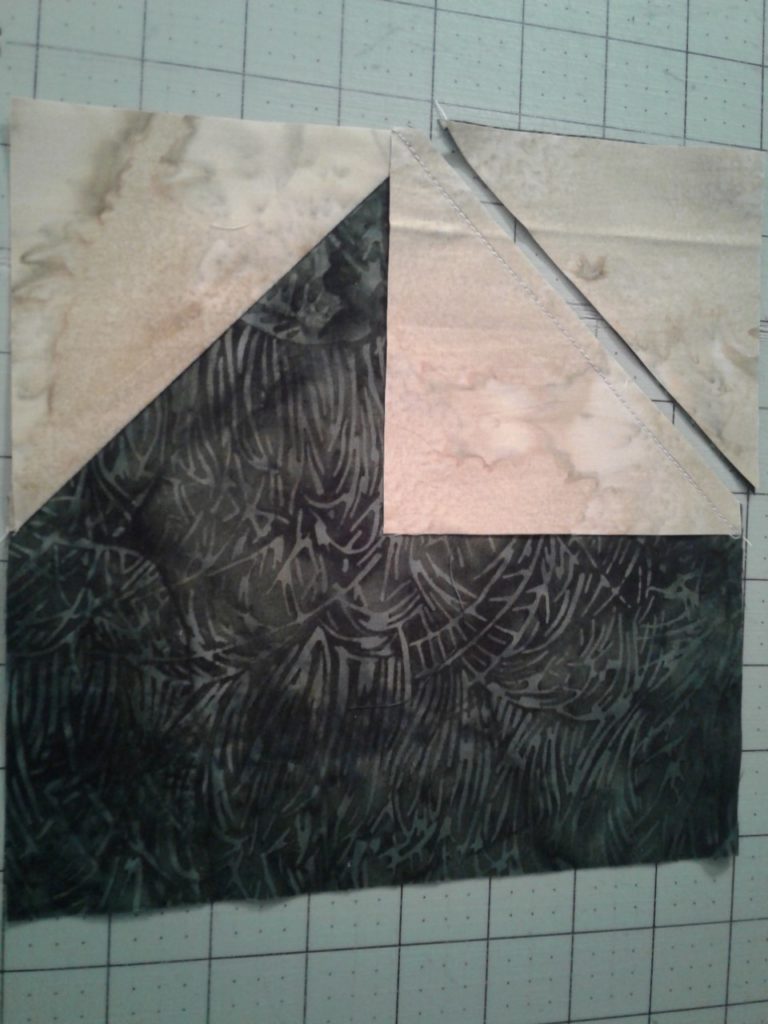
The snowballed squares became the points of my star.
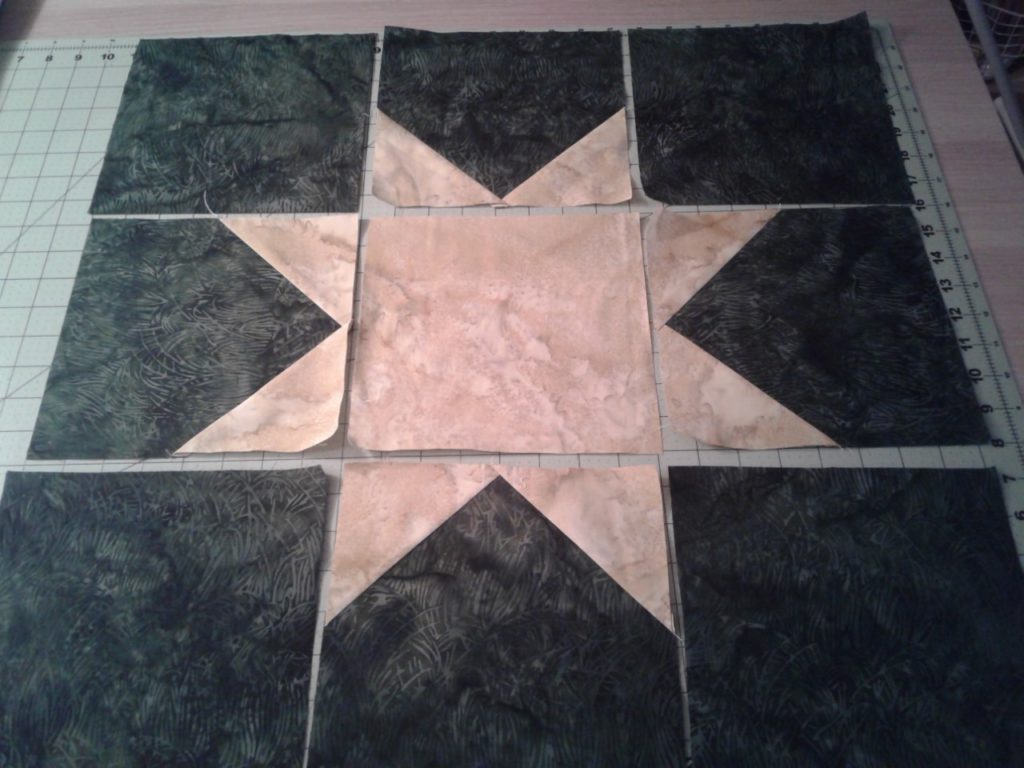
Stitching the 9 blocks together to make the center star is always fun. I love stars in my projects; and this one is no different. Working with the larger pieces also makes this project go together much faster.
When stitching together the star block, I stitch the blocks together in 3 rows, then join the rows. The seams in the first and third rows are pressed towards the outside blocks; the seams in the center row are pressed towards the center. Pressing the seams alternately allows you to really lock those seams when stitching your rows together.
Note: When pinning your rows together, match seams well…and pin just before the seam so that your needle will arrive at the pin before the seam. The pin will anchor the seams as the foot moves towards the seam.

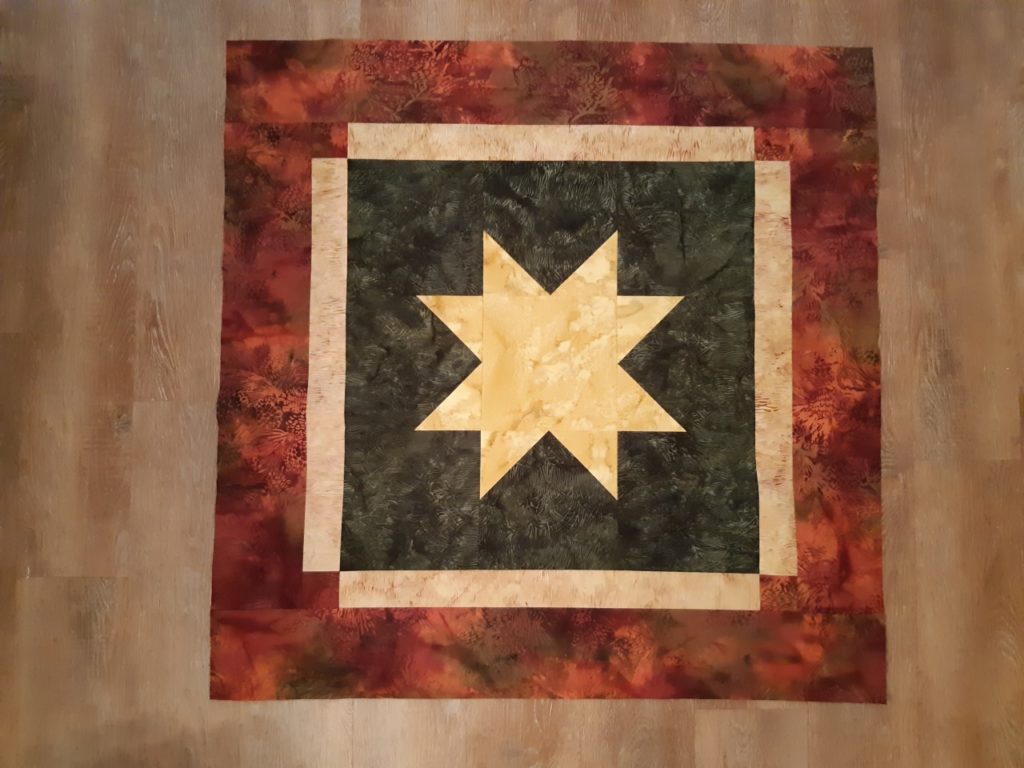
With the center star block complete, I decided to add a smaller sashing, using 2-1/2″ width strips and corner squares. Corner squares are cut from the same fabric as my outer border.
I finished with a 5″ border – but of course, to make this project a little bigger, simpler make the sashing and border wider.
This project will be completed using my HOBBS Heirloom Cotton Batting; the Crib Size format. Hobbs batting is the prefect batting for my projects. I love the feel of my project once it has been quited; the handfeel is just the weight that I love to achieve.

With the quilt top complete, it is now getting ready to travel to Western Canada where my long arm quilter will work her magic to breathe even more life into this project; then it’s back to Montreal so that I can add the binding and put it aside in anticipation of finding a special spot to display it in my home this Fall.
Please take time to visit the Island Batik and discover more about what’s happening in their batik world; check out the wonderful creations by so many wonderful Island Batik Ambassadors; and get inspired by all of the fun designs and colors brought to us by Island Batik.
Website: http://www.islandbatik.com
Blog: http://www.islandbatik.com/news
Facebook: https://www.facebook.com/islandbatik
Pinterest: http://www.pinterest.com/islandbatik
Instagram: http://instagram.com/island_batik
Kathleen McCormick
Nice! I am a big fan of stars and the batiks instantly make the old block new!
admin
Thanks Kathleen! It was such a fun project!!!!!